Another big part of the festivities are costumes. Plenty of people don't dress up, but lots and lots of people do. Did I mention I'm a nerd for this stuff? Of course I wanted to dress up too! B decided to go as a wizard, I wanted to be an elf (haha, a height joke), and we decided baby C would look really cute as a fairy (or a pixie, if she was being particularly naughty... just change the butterfly wings to dragonfly wings). Anyway, I had bought a cute pair of fairy wings for five bucks, and the costume just looked so plain. I wanted one of those hats that looks like an inverted flower. Enter: creative burst.
I had some pink fabric lying around that wasn't going towards any special project. Perfect. Here you have my *quick* hat that I made while baby C
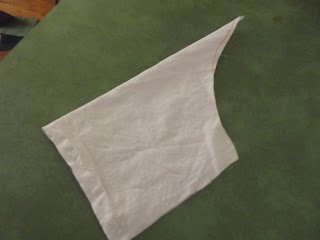
I started with the pink fabric, folded in half. This particular fabric didn't seem to have a wrong side per se, but be sure to keep the right sides together when you fold yours. I traced a quick scoop. I left a flat side for her neck, and the adjoining flat side for her face.
Then I serged them together really quick. Remember, just sew the scoop! Leave the flat sides open. If you don't have a serger, you could just as easily use a zig-zag stitch on the edge, and then reinforce it with a straight stitch. If you do have a serger, remember to test the thread tension on a double layer of scrap fabric before beginning! Since this was a quick (read: sloppy) hat, I just adjusted the tension as I went, and it turned out okay.
I also cut out 4 petal shapes (really 8, since the fabric was folded in half when I did this) to go around the face part. *Actually, I only cut out 3, planning on only using 3 petals and then one of them had my marker tracings on it, and WHOOPS, I had to cut out more... then I decided on four petals. Oh well, these things happen.
I serged around the outer parts, and turned the whole project, petals and hat, inside out.
I laid out the petals where I wanted them to be and serged them on backwards. It seems odd, but I did this so I could fold back the petals and topstitch them back. This will also keep the petals off of the face.
I put a couple of quick squares of hook and loop (one of each, duh), and it was done. Its not perfect; I would have liked to have layered the petals a bit better, but it was pretty darn good for a half hour. Check out the finished product! This was before I put the hook and loop on.
For those of you looking for a quick and easy craft, I hope this helped! Of course, you can make your own adaptions to it, and please do remember to measure your own size that you need. I didn't use measurements, I just used the baby's head.
Anon, my fair readers! Yay and verily sew your fairy flower hats... We'll be at the renaissance faire with ours!


No comments:
Post a Comment